 It's been 2017 for a few days now and life has been quite hectic for me for the past few days. I am also in the process of entering my third trimester which entails more doctor visits and tests. (In a few months I'd have a babe in my arms, how exciting!!) So, to usher in the new year I'm posting here below my January Printable. I've already begun pencilling mine in with appointments, things to do and other stuff. How are you going to fill yours up? In any case, wishing you an awesome 2017 -- one that is full of happiness, prosperity and love. 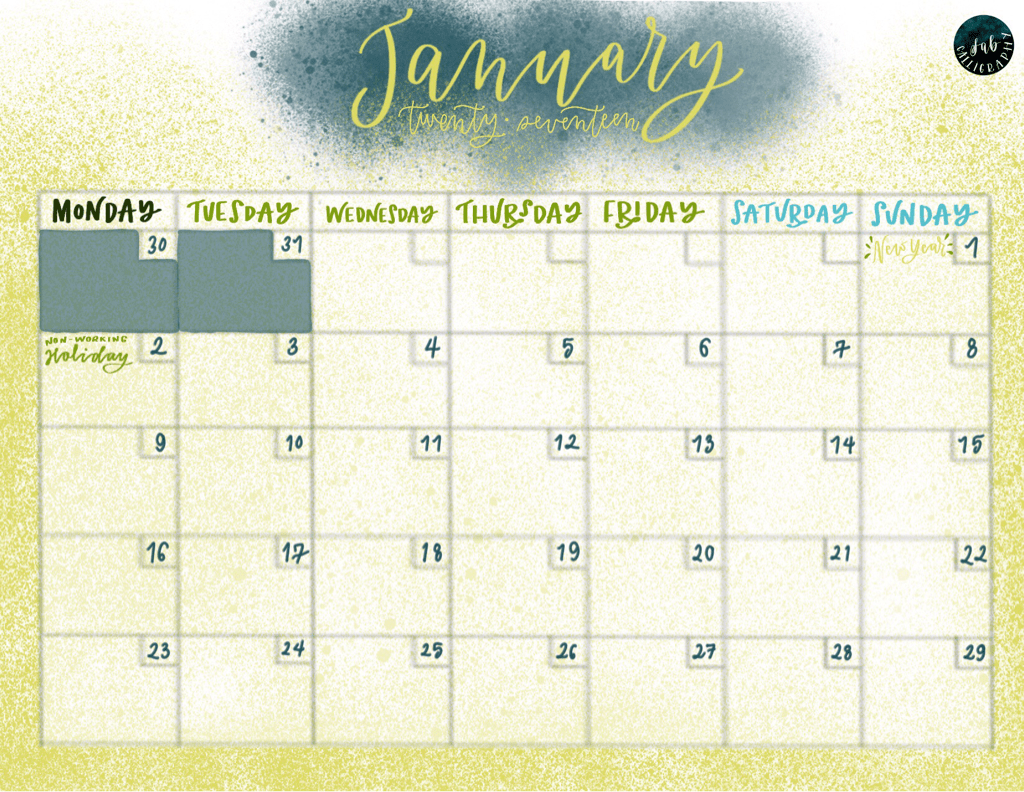
0 Comments
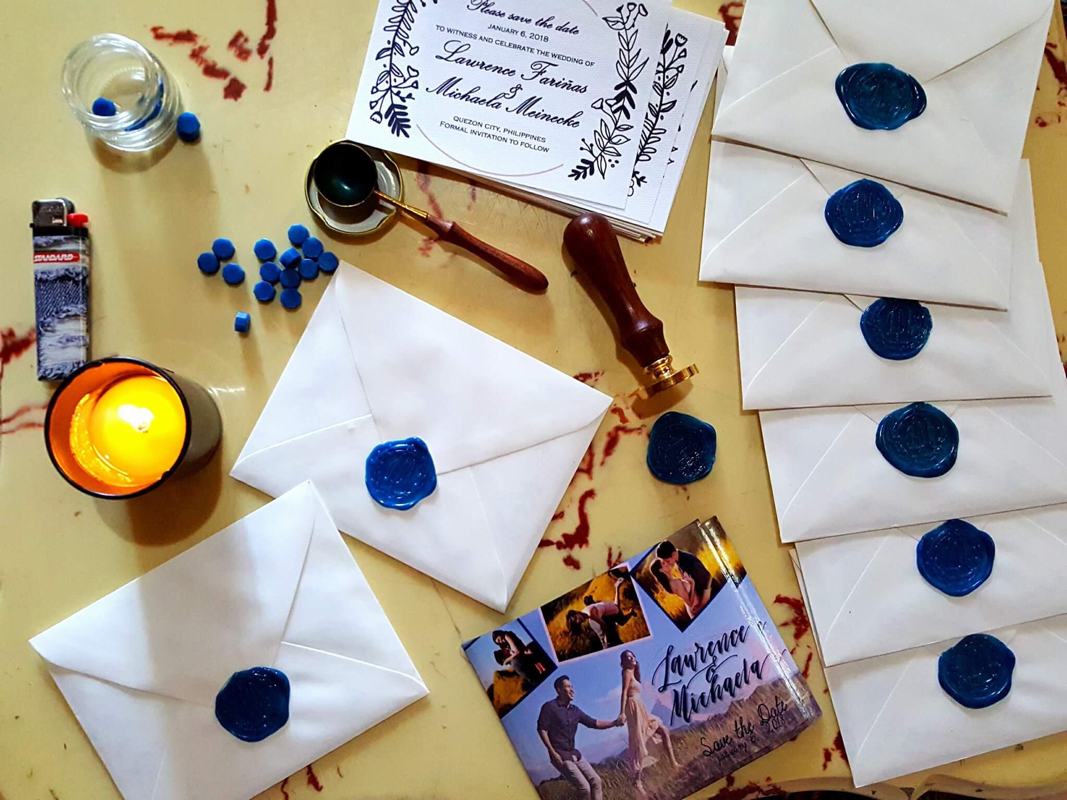
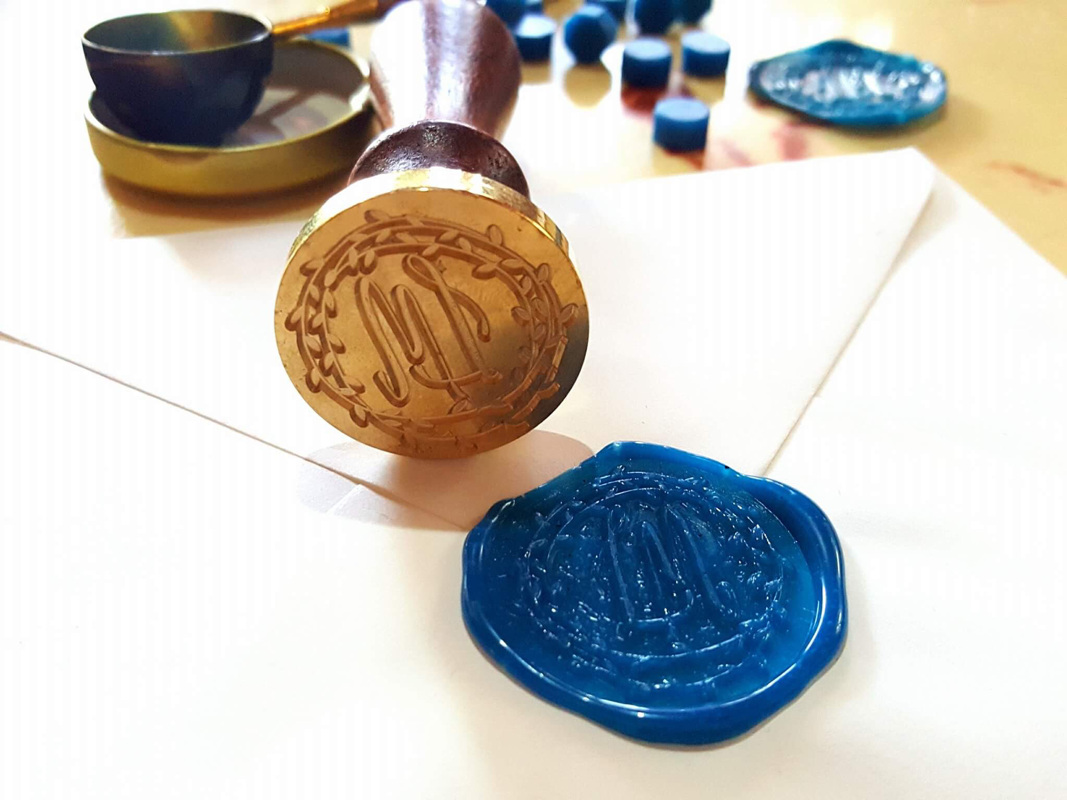
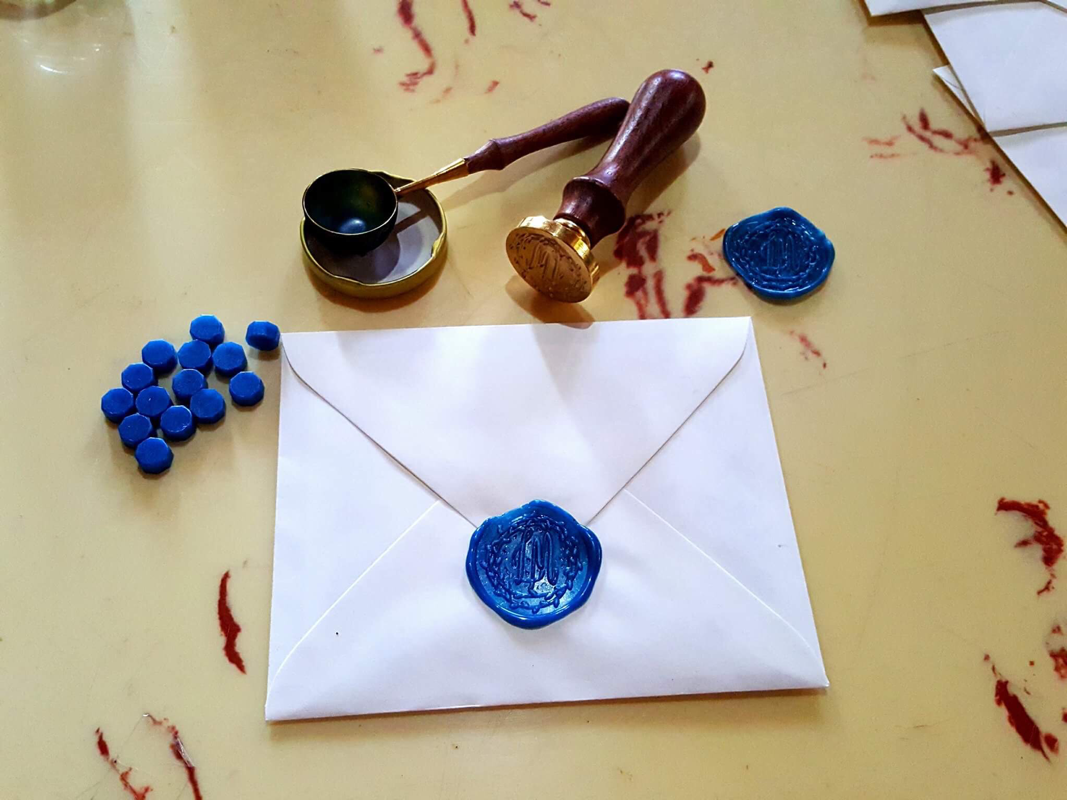
I love where this creative journey has taken me. Check it out my first wax seal design in thr flesh!! 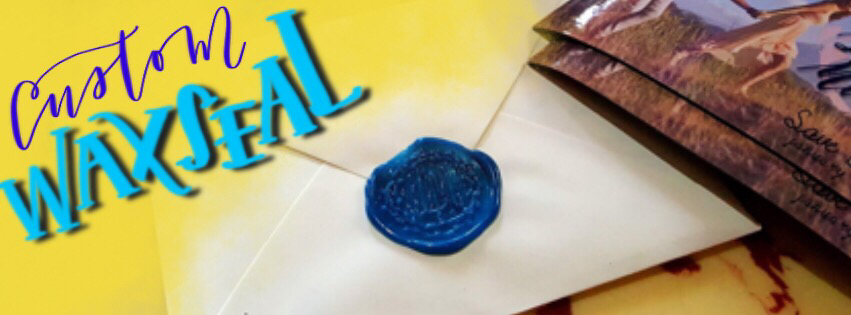 This year has seen a couple of firsts design wise for me. Its been quite a growth, one that I credit to friends who have asked me to do projects for them here and there. One such friend is Ella, who has initially asked me to design her wedding suite but has involved to include so much stuff like a blog logo for her friend, bachelorette shirts, "Save the Date" cards and now THIS--- her wax seal for the upcoming wedding. Wax seals have been all the rage recently. I was initially tinkering with the idea of even having one made for myself but never got around to doing it. Good thing chance presented itself in this opportunity! Lucky also that there are local (and by local I mean within the country) suppliers who take in custom designs. I was able to make this logo quick enough and with a few design elements like a wreathe to go around the monogram, the design was readily sent to the wax seal manufacturer. Ella herself took these photos of the final product. It looks so gorgeous and romantic!! The wax seal adds such an old school flair that it makes wedding invitations look so regal and special with very little effort. Check out the photos below!! Something I've never done before was design a website logo. I guess "never" is a thing of the past now.  A friend of mine named Ella, one who I am in the process of making her wedding suite and logo, apparently through word of mouth told her friend that I do calligraphy works. This is how I met Cinderella in the cyber world. She's a lifestyle blogger who was in the process of sprucing up her website and needed a logo. Being a first timer I gave the disclaimer that I HAVE NOT DONE THIS BEFORE but I'm willing to give it a try. I had a rough idea how the process would go but haven't actually done it. But what the heck right? Why let the opportunity fly by? The process alone would be a learning experience. Not to mention having the finished work displayed for all the internet world to see. So I started out sketching her name "Cinderella Merz" in pencil then once happy went over it again with my bordeaux Cocoiro Brush Pen. After I was happy with the handwritten part, I scanned it on the computer and exported the image on Adobe Illustrator for even more fine tuning. 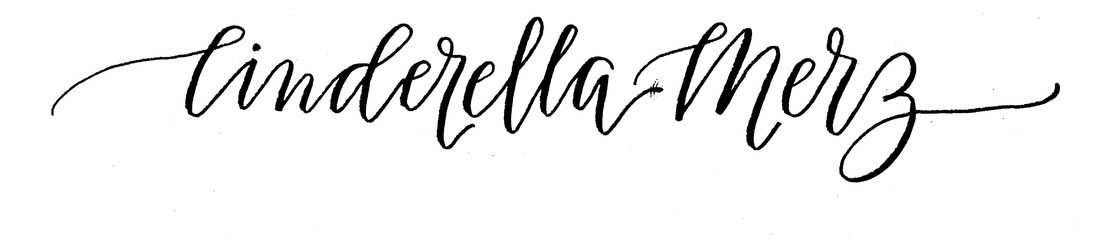 Here's the fresh scanned image. As you can see there were a lot of things I needed to erase --- like the place where my fingers smudged the ink at the end of the letter "a". So I did all that on Adobe Illustrator. Working with paths and vectors is quite intimidating at first but after you get the hang of it you'll find that there's a lot you can do on the application to improve but still retain the spirit of your lettering.  So many dots! That's what the vectorized image looks like! You can manipulate all those individual points to make the stroke thinner, smother, fatter or gone all together. Youtube is a rich resource on how to use Adobe Illustrator. Don't be afraid to research and learn. 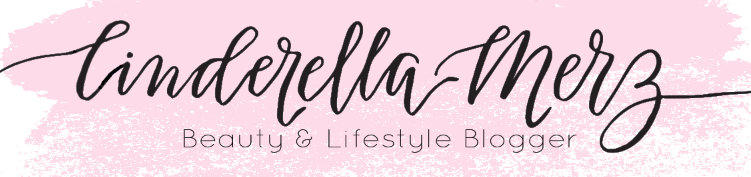 Finally, it was on to photoshop for the FINAL fine tuning like adding color, background and more text. Some letters were resized, others stretched, etc. This is the longest part of the process and where there are the most changes. Brightness was tweaked. So was the contrast until the final product was perfect for Cinderella's website. So here's a look at what her site is now. Do check it out as well for all the beauty tips found inside. :)  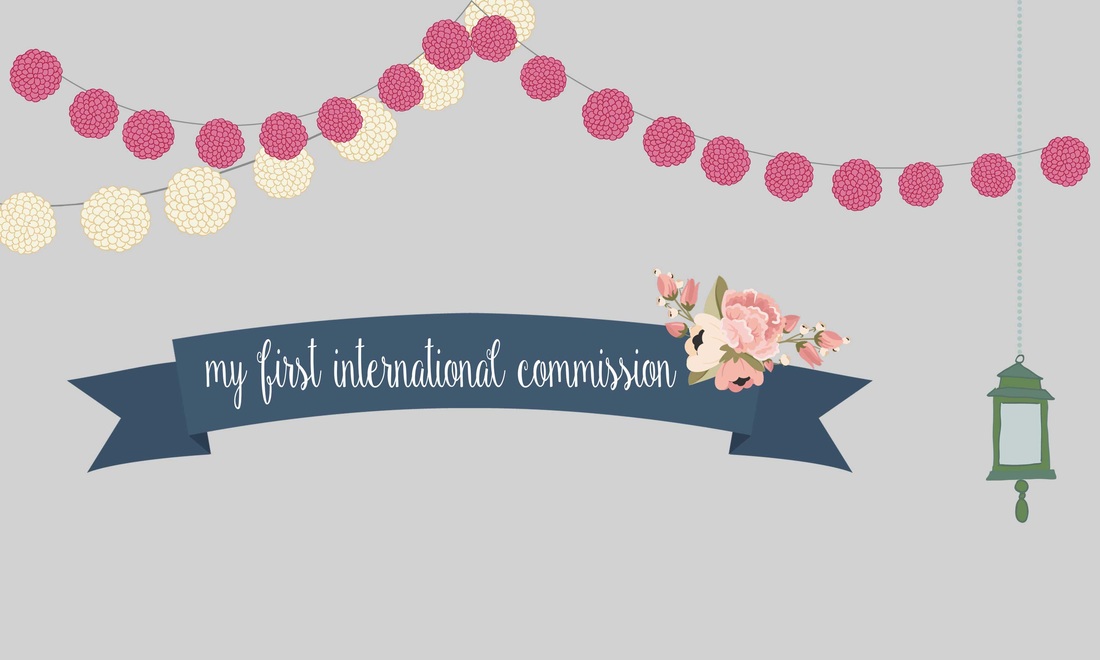 A few days ago I got a DM on my IG account from a graphic designer the United States -- out of the blue!! She asked if I was willing to help her by writing a few names in calligraphy for a wedding suite she was making. Of course I jumped at the chance!! So, I asked what she needed and a style peg so I know what design aesthetic she was going for. Totally excited while emailing of course coz this was going to be my FIRST INTERNATIONAL COMMISSION. Here's a snap of our chat -- I'm blurring out his/her name to be revealed when the final suite comes out! :) 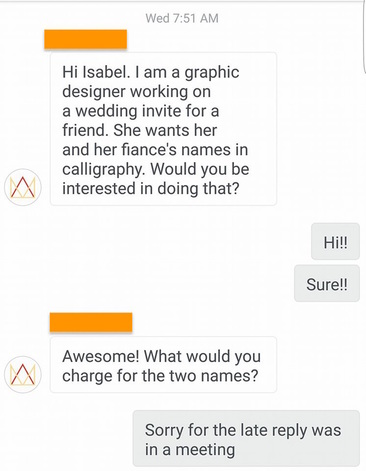 Another reason why I'm super gung-ho to do this is because of Procreate. For those who havent seen the countless #ipadlettering photos and videos that have gone online in Instagram, there is this app which has become quite famous among letterers especially when the Apple Pencil was released. It allows you to do lettering on your ipad and mimics quite well what a calligraphed finish product would look like. Plus there are numerous tools (ie brushes) at your disposal and if you arent satisfied you can create your own! So to make the work for this commission I skipped the whole pencil and paper part and went straight to digital. However, I am NOT using an apple pencil simply because that device only works for IPAD Pros and i only have the ipad mini version 2.0. Luckily, through research I found out that the #wacom Intuos Creative Stylus 2 could work for my ipad and with the new updates now on Procreate i have now been able to doodle to my hearts content producing professional looking work! Below are a few of my "Tries" and "misses". thats it for now. in a few days im thinking of sharing a couple of floral procreate brushes i made. stay tuned for that PLUS the big reveal of how the finished international commission looks like!
Keep creating! 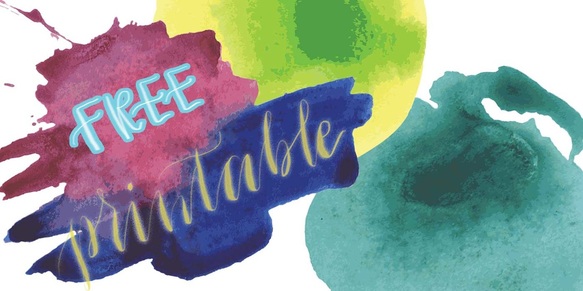 As i mentioned in my previous post, I'm getting a hang of Photoshop and my new tool the Wacom Intuos Draw tablet. I'm almost done with my online lessons and I feel like I'm getting the hang of it slowly. Same with the wacom, which I've only used a couple of times. So I thought that this would be a perfect time to send out a FREE PRINTABLE!! I dont know about you but I'm a list kind of girl. I have a list for everything: movies i need to watch, things i need to buy and most importantly a TO DO list! So I dont lose track of all these things, I keep them all in a handy notebook. (Calligraphy Ink friendly of course! In case I want to beautify with my pens and such.) Which is why the free printable this time around is a TO DO LIST. The theme is more like a "grocery" feel because I know I have to buy necessities soon. But you can use it for just about anything. Plus, it's very satisfying to tick off an accomplished task -- hence the boxes on the left hand side. Dont you feel productive, when at the end of the day, all your TO DOs have been checked of? Size of the printable is our regular short bond paper (8.5 x 11 inches) so you shouldnt have any trouble printing this using house printers. Hope you enjoy the little freebie!! :) I've also included guidelines for easy cutting. As a tip, you guys can even print a couple of them (say 10 pages making 20 pieces), cut and using some padding glue to make a TO DO pad. You'd have a ready supply of these lists handy for last minute items. Or keep them inside your handbag. That's it for now. Enjoy! 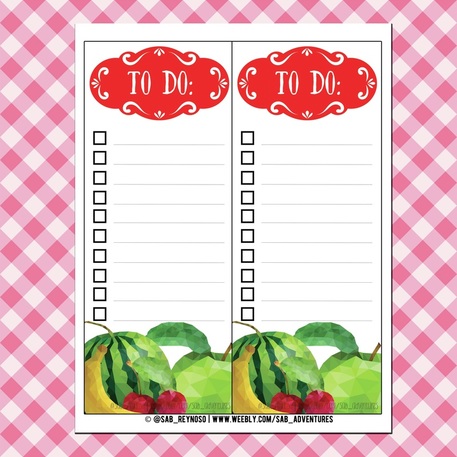
|
|||